
Here we can see, “0xC000021A – Fix for Windows XP, Vista, 7, 8, 8.1, 10”
For Windows XP, Vista, 7, 8, 8.1, or 10, here’s how to fix the “0xc0000021A: problem.”
Symptoms and description
This mistake is linked to the error messages, alerts, warnings, and symptoms listed below.
Symptom 1: 0xc000021A error screen
The 0xC000021A error is a Blue Screen of Death (BSoD) error when a Windows user-mode subsystem is exploited (related: Blue Screen of Death tutorial).
Description
WinLogon or Client Server-Run Time Subsystem are two user-mode subsystems in Windows (CSRSS). These two subsystems are required for Windows to function.
If any of these are compromised, Windows will cease working and display this error.
The following is a typical error message that may appear on your screen:
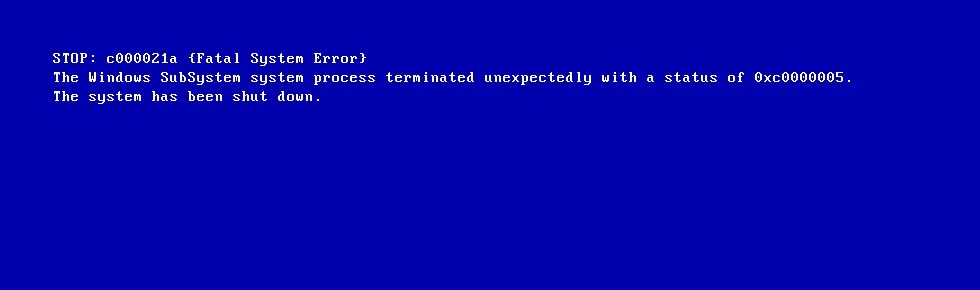
STOP: c000021a {Fatal System Error}
The Windows SubSystem system process terminated unexpectedly with a status of 0xc0000005.
The system has been shut down.
The error code 0xC000021A is also known as:
- STOP 0xC000021A
- STATUS_SYSTEM_PROCESS_TERMINATED (Status System Process Terminated)
- HALT: c000021a {Fatal System Error}
- STOP c000021a
On a Windows XP system (also for Windows Vista or Windows 7 computers), 0xC000021A displays as follows:
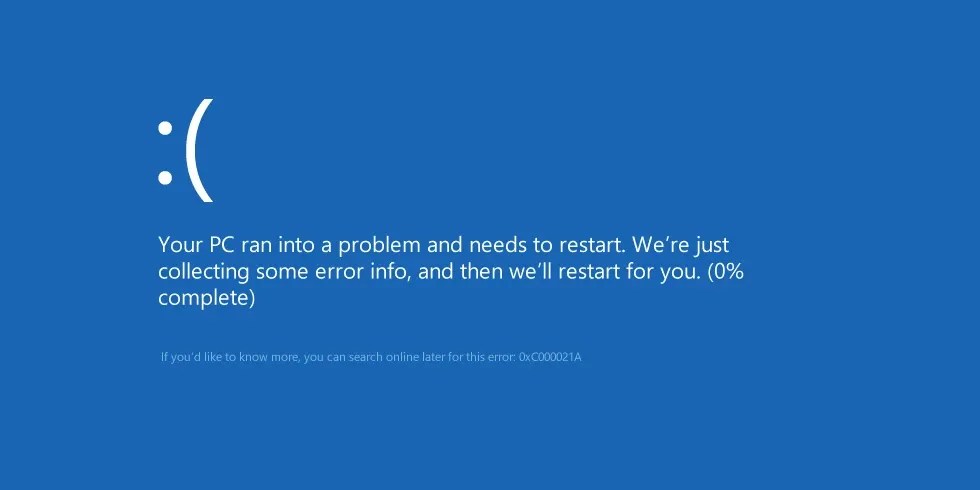
The error message in Windows 8, Windows 8.1, or Windows 10 looks like this (but with the same problem code):
This Error’s Causes
One or more of the following factors have been linked to this error:
Cause 1: Misconfigured software or driver
A malfunctioning essential piece of software or system driver is the most prevalent cause of this issue.
Cause 2: The system registry has been corrupted
A damaged system registry is another possible reason for this problem. This can be caused by read/write mistakes on the disc, power interruptions, or virus attacks.
Getting rid of “0xc000021A” on Windows
Easy Recovery Essentials’ built-in Automated Repair tool is guaranteed to automatically fix the “0xC000021A” issue. EasyRE can be downloaded and produced on any PC and is presently available for Windows XP, Vista, 7, and 8.
- Easy Recovery Essentials is a free download. Before you download EasyRE, note your Windows version (XP, Vista, 7, or 8).
- The image should be burned.
- Start your computer with the Easy Recovery Essentials CD or USB you made.
- After EasyRE has started, select “Automated Repair” and click Continue.
- After EasyRE has finished scanning your computer’s discs, find and pick the drive letter for your Windows installation from the list, and then click the Automated Repair option to start the repair process.
- Easy Recovery Essentials will begin looking for faults on the selected drive. EasyRE will scan the disc, partition, bootsector, filesystem, bootloader, and registry for faults and rectify them automatically. EasyRE’s repair is automated; thus, no interaction is required.
- EasyRE will provide its findings after the process is completed. To reboot your PC and test the changes, click the Restart option.
- As your PC starts to load, the “0xC000021A” error should be fixed.
On Windows XP, fix 0xC000021A
Fix 1: Enter the Last Known Good Configuration mode
When you start your Windows XP system into Last Known Good Configuration mode, your computer is forced to use a previously saved Windows Registry version: the last time your machine booted without issues.
For the 0xC000021A problem, the Last Known Good Configuration mode can be a simple remedy.
Follow these procedures to put your machine into this mode:
- Restart the computer if necessary.
- Wait for the POST process to finish on the machine (system information appearing on your screen).
- Press the F8 key quickly and frequently until you get a list of boot options.
- Select the Last Known Good Configuration (your most recent settings that worked).
- Press Enter
- Wait for your computer to enter this mode after it has booted up.
Fix 2: Remove any previous software or drivers that have been installed
If the error occurred shortly after installing a new piece of software or hardware driver or any other type of new installation on your Windows XP machine, boot into Safe Mode and delete it.
Contact the maker or look online for a compatible Windows XP update version of that software or driver.
Follow these instructions to start Windows XP in Safe Mode:
- Restart your computer.
- Before the Windows XP logo appears, press the F8 key.
- Select Safe Mode from the Windows Advanced Options menu.
- Press Enter
Fix 3: Perform a System Restore
If your computer’s System Restore feature is enabled, you can attempt to restore the system to a previous restore point.
To do so, run System Restore in Safe Mode on a Windows XP system by following these steps:
- Restart the computer if necessary.
- To enter the Windows Advanced Options Menu, press the F8 key.
- Select Safe mode with Command Prompt with the arrow keys.
- Press the Enter key.
- As an administrator, log in.
- When the Command Prompt appears, type and hit Enter the following command:
%systemroot%\system32\restore\rstrui.exe
7. To restore your computer to a previous state, follow the directions on the screen.
Fix 4: Additional advice
If none of the preceding suggestions works for your machine, try the following suggestions:
- Use the original installation CD to reinstall Windows XP.
- Install all available Service Packs for Windows XP, and if your version of Windows XP doesn’t have any, install them now.
On Windows Vista and 7, fix 0xC000021A
Fix 1: Remove any previous software or drivers that have been installed
If you’ve recently installed a new piece of software or a driver, boot into Safe Mode and delete it.
- Before the Windows Vista or Windows 7 logo shows, restart the computer and click the F8 key.
- Select Safe Mode from the Advanced Boot Options menu and click Enter.
Fix 2: Run Startup Repair
The Startup Repair application is included on your original Windows Vista or Windows 7 installation disc (DVD), which you can use to fix the 0xC000021A error.
Follow these instructions to run Startup Repair on a Windows Vista or 7 system:
- Start Windows Vista or 7 by booting from the DVD, the original DVD.
- To boot from the DVD, press any key.
- Click Repair your computer on the Welcome screen.
- Select an operating system.
- Click Next
- Click Startup Repair on the System Recovery Options screen.
- Wait for the procedure to complete.
- When prompted, restart the computer.
Fix 3: Use the most recent good configuration
You can also try to boot into the Last Known Good Configuration, which will attempt to use a previously error-free version of your system’s Registry, similar to the Windows XP instructions above.
Follow these procedures to enter this mode on a Windows Vista or Windows 7 system:
- Start your computer by restarting it or shutting it down fully and then pressing the power button.
- Press the F8 key repeatedly (touch the key, not hold it down) until the Windows Vista or Windows 7 logo displays on your screen. You may need to keep the Fn key pressed down while tapping the F8 key on some laptop models.
- Navigate to the Advanced Boot Options menu using the arrow keys and pick Last Known Good Configuration (Advanced) from the list.
- Press Enter.
Fix 4: System Restore
If System Restore is enabled on your computer, you can select an earlier restore point to boot into it successfully.
If an incompatible software or driver is causing the 0xC000021A problem, System Restore will restore your computer to a previous state when the incompatible software or driver was not installed.
To do so, you must first enable System Restore on your computer before installing the software or driver that triggered the error.
Follow these instructions to execute System Restore in Safe Mode:
- Startup the PC.
- Before the Windows Vista or 7 logo shows, press the F8 key.
- Select Safe Mode with Command Prompt from the Advanced Boot Options page.
- Press Enter
- As an administrator, log in.
- When the Command Prompt appears, type the following command and then click Enter:
rstrui.exe
7. Follow the wizard’s instructions to restore your computer to a previous date.
If you have the original Windows Vista or Windows 7 installation disc, you can access System Restore by booting into the installation disc and selecting System Recovery Options > System Restore.
Fix 5: Command Prompt Last Restore Point
If System Restore does not load, you can use the Command Prompt to run the dism command to automatically recover the last restore point: (System Restore must be enabled):
- To enter Windows Advanced Options, restart the computer and use the F8 key.
- Select Repair your computer and press Enter. If the Repair your computer option isn’t available, boot into System Recovery Options using your original installation disc.
- Select Command Prompt from the System Recovery Options menu.
- When Command Prompt displays, type and press Enter the following command:
dism /image:C:\ /cleanup-image /revertpendingactions
Replace C: with the letter of the driver where you installed Windows Vista or Windows 7.
Fix 6: Use msconfig to disable services
You can try disabling the Services indicated in the System Configuration (msconfig) utility if the 0xC000021A problem is generated by a software or driver that starts when your Windows Vista or 7 system starts:
- Start your computer.
- Click Start
- Type msconfig
- Press Enter
- Disable all of the services specified in Startup (or Services).
- Click the OK button.
- To make the changes take effect, click Restart.
- Restart the computer if necessary.
If your machine starts up after you make the modifications, the problem could be caused by one of the services mentioned in the Startup tab.
To figure out which service is causing the problem, restart the computer and activate each of the services listed there until you find the one causing the problem.
On Windows 8, 8.1, and 10, fix 0xC000021A
Fix 1: Clean Boot
Follow the instructions below to do a clean boot. If it works, a Clean Boot will allow you to troubleshoot the 0xC000021A problem thoroughly.
- Start your computer.
- Go to Desktop and press the Start button.
- To use the Run utility, press the Windows and R keys together.
- Type msconfig
- Press Enter
- In the System Configuration window, go to the General tab.
- Selective startup is selected.
- Uncheck the box labelled Load startup items.
- Select the Services tab.
- Hide all Microsoft services is checked.
- From the bottom right, select Disable all.
- Navigate to the Startup tab.
- Disable all of the services mentioned there by right-clicking on each one and selecting Disable.
- Restart the computer if necessary.
If the 0xC000021A error no longer appears on your machine, it’s possible that a service listed in Startup is to blame. To figure out which service is causing the problem, go back to msconfig, enable each service one by one, and restart the machine until the error reappears.
Fix 2: Remove any software or drivers that have been installed
Newly installed applications or drivers can cause this issue. If Fix 1 worked, you’d need to uninstall that piece of software or driver.
Alternatively, look for an updated version or one compatible with your Windows version: 8, 8.1, on the manufacturer’s website.
If you can’t get into your computer, try starting it in Safe Mode and uninstalling the software or drivers you need:
- Before the Windows 8 logo shows, restart the machine and press the F8 key. Try the F11 key if the F8 key doesn’t work.
- Click Troubleshoot > Advanced Options > Startup Settings > Restart
- To enter Safe Mode, press the F4 key.
You can boot into Safe Mode using the original CD if you have it:
- Restart the computer after inserting the DVD.
- To boot from the media, press any key.
- Click Repair your computer.
- Click Troubleshoot > Advanced Options > Startup Settings > Restart
- To enter Safe Mode, press F4.
Fix 3: Run DISM command
Follow the instructions below to boot your Windows machine into Safe Mode using Command Prompt and run the dism command:
- Restart your computer.
- Before the Windows 8 logo shows, press the F8 key during boot. Try Shift and F8 or just the F11 key if the F8 key doesn’t work.
- Select Troubleshoot from the drop-down menu.
- Select Advanced Options
- Choose Startup Options.
- Press the Restart button.
- To enter Safe Mode with Command Prompt, press the F6 key.
- When the Command Prompt appears, type and hit Enter the following command:
dism /image:C:\ /cleanup-image /revertpendingactions
Substitute the drive letter where Windows 8/8.1/10 is installed for C:
9. You can also use the following commands:
cd C:\Windows\WinSxS
after that:
move pending.xml pending.old
If a pending.xml file exists, this will work.
Fix 4: System Restore
If you have System Restore turned on in Windows 8/8.1/10, you can use it to restore your machine to a previous state.
- Restart the computer if necessary.
- F8 or F11 are the keys to use.
- If prompted, select a keyboard layout.
- Select Troubleshoot
- Click Advanced Options
- Restore the system by clicking System Restore.
- Choose an operating system.
- The System Restore dialogue box will now appear. Next should be selected.
- Click Next after selecting a restoration point.
- To confirm the restore point, click Finish.
- When the warning message appears, select Yes.
- Wait for the procedure to complete.
Fix 5: Disabled driver signature.
If you turn off Driver Signature, Windows 8/8.1/10 will also use drivers not signed directly by Microsoft.
This procedure may be useful if an error is caused by one of the drivers that load at startup.
- Restart the computer if necessary.
- F8 is the function key. Try the F11 key if the F8 key doesn’t work.
- Select Troubleshoot > Advanced Options > Startup Settings from the Troubleshoot menu.
- Press the Restart button.
- To boot into Windows with driver signature enforcement off, press the F7 key.
Fix 6: Reset
You can restore your system on Windows 8/8.1/10 by performing a system reset. Please keep the following in mind before proceeding:
- All personal files on your computer will be erased if you perform a Reset.
- If your machine is running Windows 8.1, a Reset will reset it to Windows 8. After you’ve completed the reset, you’ll need to update to Windows 8.1.
Follow the steps below:
- Restart the computer if necessary.
- F8 or F11 are the keys to use.
- If prompted, select a keyboard layout.
- Click Troubleshoot
- Click Reset your PC
- To finish the process, follow the steps.
Troubleshooting the 0xC000021A error
In Windows XP, you can debug
While the 0xC000021A error is frequently caused by incompatible software or drivers that you may have just installed, you can troubleshoot it further utilising the Dr Watson tools in Windows XP.
The procedures for utilising Dr Watson to debug the error are as follows:
- Open the Command Prompt window.
- Press Enter after typing the following command:
System Root\System32\Drwtsn32.exe -I
Type this and press Enter:
System Root\System32\Drwtsn32.exe
Then choose one of the following options: Append to an existing log file, Create crash dump, or Visual Notification. By default, Dr Watson’s log file is saved in the following folder:
C:\Documents and Settings\All Users.WINNT\Application Data\Microsoft\Dr Watson
If the utility software failed to create a log file, you could use the Userdump.exe utility to do so:
- User Mode Process Dumper 8.1 can be downloaded from. http://www.microsoft.com/en-us/download/details.aspx? id=4060.
- Start Setup.exe.
- Navigate to the Control Panel.
- Select Process Dump
- After adding the application name to the Monitor list (Lsass.exe, Winlogon.exe, Mtx.exe, Dllhost.exe).
- Click the name you just added in Monitor and then Rules.
- Select the sort of error you wish triggered by clicking Custom Rules (for example, Access violation errors).
Conclusion
I hope this information was helpful. If you have anything to add, please do so in the comments.
User Questions:
1. What is the solution to the 0xC000021A error?
- Restart the computer if necessary.
- F8 or F11 are the keys to use.
- If prompted, select a keyboard layout.
- Select Troubleshoot from the drop-down menu.
- Select Advanced Options from the dropdown menu.
- Restore the system by clicking System Restore.
- Choose an operating system.
- The System Restore dialogue box will now appear. Next should be selected.
2. What does the error code 0xC0000221 mean?
The value of the STATUS IMAGE CHECKSUM MISMATCH bug check is 0xC0000221. This implies that a system DLL or a driver has been corrupted. This is a programming-related topic. See Troubleshoot blue screen errors if you are a client who has received a blue screen error code while using your computer.
3. What should I do if Windows is planning an automated repair?
The official Windows method for Preparing Automatic Repair is to upgrade or reset the PC directly. This is how the repair works: hit the power button three times in the Preparing Automatic Repair box to cause the machine to shut down. After the restart, the system will request a repair.
4. Error 0xc000021a on Windows 10
5. Windows 10 machine won’t boot(0xc000021a)


