
They consider that Mojave Macs have showcased a built-in instrument to create, taking a screenshot a straightforward and effortless procedure. Here is how to catch a screengrab, whether you would like the entire screen or just a part of it.
Screenshot Tool
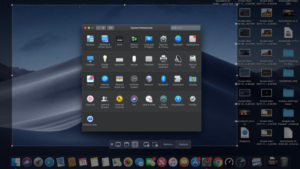
If you would like to start the screenshot tool, browse to Launchpad > Additional > Screenshot, or use the shortcut Shift+Command+5. You’ll have the choice to have a screenshot of the full display, a window that is chosen, or a customized section of the display.
There are also choices to catch the recorded video, for instance, the whole screen or a customized section of the display. A choices drop-down menu lets you select where to store screenshots, establish a timer, and alternative configurations.
Grab the Whole Screen
It’s possible to choose a screengrab of the whole display from the screenshot tool, or you could use the shortcut Shift+Control +3. By default, the screenshot will save a .png file onto your desktop computer.

Screenshot Part of the Display
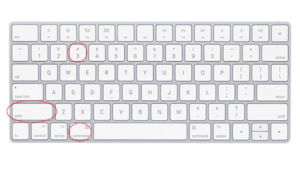
To catch a particular portion of your display, press Shift+Command+4 along with your pointer will change to some cross-hair. Drag and click the cross-hair, so it covers the region you want to capture. Let head to catch the chosen area or press the Esc key to cancel. By holding down Shift, Option, or Space Bar, you can alter the selected area’s size, shape, and location before shooting a picture. The screenshot will be saved as a .png record in the background.
Capture a Window or Menu
To have a screenshot of a particular window menu, press Shift+Control +5, and the pointer will turn to a camera. Transfer the camera above the window to highlight it, then click to save the picture for a .png file onto your desktop computer. You could even switch back and forth between shooting a personalized choice and catching a special menu by hitting the space bar.
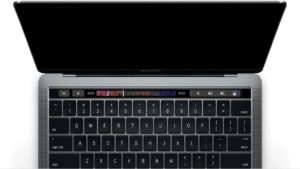
Take an Image of the Touch Bar
When you’ve got a Mac using a Touch Bar, it is possible to have a screenshot of it by pressing Shift+Command+6. The picture will be stored as a .png file on your desktop computer.
Change Where Your Mac Screenshots Are Saved
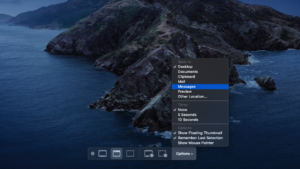
By default, screenshots are stored on your desktop computer, but you can alter this. Open the screenshot tool with Shift+Command+5, or simply by heading to Launchpad > Additional > Screenshot > Alternatives. Beneath the menu segment Save, you can pick a new default place, such as Documents, Clipboard, Mail, Messages, or Preview. Or click Other Location to select a particular folder.
Rather than saving screenshots straight to your pc, you may instead send them into the clipboard by adding the Control key to some shortcut control. For example, use Shift+Command+Control+3 to capture the whole screen, or Shift+Command+Control+4 to choose a screenshot of a display section. You may then paste the screenshot anyplace you like.
Change Image Format
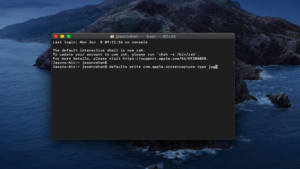
By default, screenshots on Mac are stored as .png documents, but these can get quite large, especially if you’ve got a sizable Retina screen monitor. You can change to .jpg format having a small amount of programming. Proceed into Launchpad > Additional > Terminal and type the next within the window:
defaults write com.apple.screencapture type jpg
Enter your password if requested, then restart the pc. Prospective screenshots should save from the preferred arrangement you specified. You could always change it back by typing the above command with PNG in the end instead.

Third-Party Options
Should you think instead of a third-party alternative, Snagit has everything you might desire and includes a $50 price tag. The identical company also creates a free program named TechSmith Capture (previously Jing). Additional free options comprise Skitch and LightShot, whereas Snappy may sync screenshots using the Snappy program for iOS.

How to Take a Screenshot on Any Device
Here is all you will need to know about shooting screenshots, whatever the system –Windows, macOS, Chrome OS, iOS, Android, and Linux.


