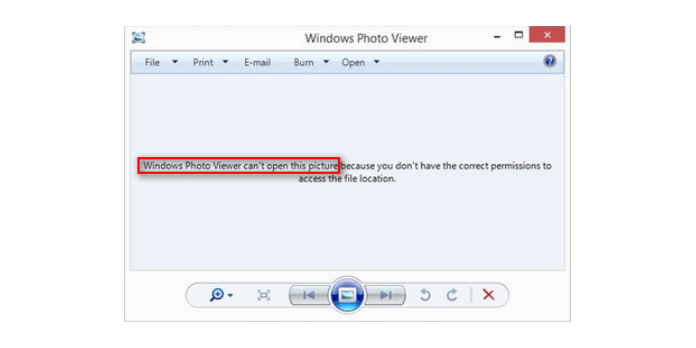
Here we can see, “Windows Photo Viewer Not Printing? Try These Easy Solutions”
- If the Windows 10 Photo Viewer isn’t printing correctly, it could be due to recent Windows upgrades.
- You can only wait for the following updates if this is the reason you can’t print using Windows Photo Viewer on Windows 10.
- Extract the files first to troubleshoot the Windows photo viewer, not the printing issue.
- Also, if you can’t print from the pictures app on Windows 10, try the specialized troubleshooter.
Users of Windows Photo Viewer can print directly from the program with just a few clicks. After submitting a print job, you may observe that Windows Photo Viewer fails to print or only prints partially, leaving most of the page blank.
On the Microsoft community forums, other people have encountered identical problems. As a result, we’ve included a few troubleshooting suggestions in this post to assist you in resolving Windows Photo Viewer printing issues.
Note: If you’ve only recently started experiencing the error after installing one of the recent cumulative updates (KB5000802, in particular), the problem is with Microsoft. They’re working on a remedy, which should be included in the next round of updates.
What should I do if Windows Photo Viewer refuses to print?
1. Remove the most recent updates
- Open the Windows Settings application.
- Then choose Update and Security. View the history of updates.
- Select Uninstall Updates from the drop-down menu.
- As previously said, KB5000802 could be the source of the problem, so locate it, right-click it, and uninstall it. If you think another update is to blame, uninstall it.
- Allow time for the modifications to be removed.
- Restart your computer.
2. Before printing, unzip the zip file
- If you try to print from a zip file without first extracting it, you may be unable to do so.
- Extract the Zip file by right-clicking on it.
- Go to the extracted folder and open it.
- In Windows Photo Viewer, open the image.
- Check for any improvements by printing the photo.
3. Choose your default printer
- To open Run, press Windows Key + R.
- To open Control Panel, type control and click OK.
- Go to Devices and Printers under Hardware and Sound.
- Right-click on your desired printer from the list of installed printers.
- Choose the option to make it the default printer.
- The Control Panel window should now be closed.
- Check if you can print right now with the Photo Viewer app.
4. Use the printer troubleshooter to find out what’s wrong with your printer
- Select Settings from the Start menu.
- Go to Security and Updates.
- Scroll down and select Printer from the drop-down menu.
- To run the troubleshooter, click the Run the Troubleshooter button.
- Follow the on-screen instructions and make the suggested changes.
- Close the troubleshooter and see if anything has changed.
5. Add the printer again
- Take out the printer.
- Select Settings from the Start menu.
- Go to the Devices tab.
- Select Printers and Scanners from the left pane.
- Select your printer by scrolling down.
- Remove the device by clicking the Remove Device button.
- To confirm the action, click Yes.
Reinstall the printer.
- Select Settings from the Start menu.
- Devices that are open.
- Choose from a variety of printers and scanners.
- Add a printer or scanner by clicking the Add a printer or scanner button.
- Ascertain that your printer is linked to your PC.
- When your printer is discovered, please select it from the list and complete the setup by following the on-screen directions.
- Check for any upgrades in the Windows Photo Viewer program.
6. Make Windows Photo Viewer your default photo viewer.
- Select Settings from the Start menu.
- Go to the Apps section.
- Select the Default Apps tab from the drop-down menu.
- To go to the photo viewer, go to the bottom of the page and scroll down.
- Choose a default choice by clicking on it.
- Select Windows Photo Viewer from the list of programs after scrolling through them.
- Close the Settings window and reopen it to see if anything has changed.
7. Run the System File Checker program
- Type cmd while holding down the Windows key.
- Select Run as Administrator from the context menu when you right-click on Command Prompt.
- Enter the following command in the Command Prompt:
- The System File Checker (SFC /scannow) command will now scan the system files and replace any corrupt files with updated files.
- Once the scanning is complete, close the Command Prompt.
- Check for any improvements in Windows Photo Viewer.
Conclusion
I hope you found this information helpful. Please fill out the form below if you have any questions or comments.
User Questions
1. Why am I unable to print photographs from my computer?
One of the most common causes for a printer not printing the images you’ve requested is that the equipment isn’t properly connected. Otherwise, you risk making the traditional error of pressing the ‘print’ button twenty times or more.
2. What’s wrong with my Windows Photo Viewer?
Many customers have complained that the photo viewer in Windows 10 isn’t working properly. If you’re one of them, try using a different photo viewer or double-checking your antivirus settings. You can also try reinstalling, upgrading, or debugging the program as necessary.
3. What is the best way to print photos using Windows 10?
Locate the photo you wish to print using Windows 10’s File Explorer, and then right-click on it. On the pop-up menu, select the “Print” option. On the screen, the Print Pictures window appears.
4. Issue with Windows Photo Viewer? : r/Windows10 – Reddit
5. Issue with Windows Photo Viewer? : r/techsupport – Reddit


