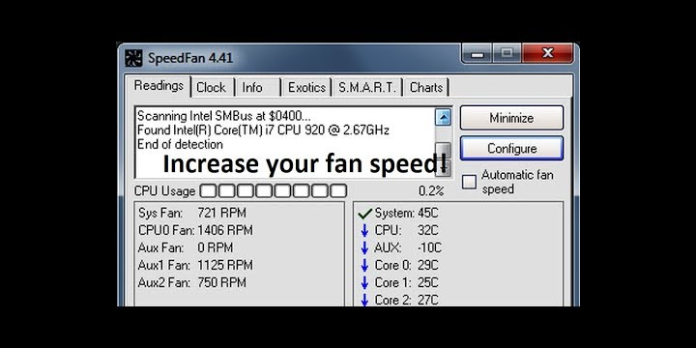
Here we can see, “How to: Change Cpu Fan Speed in Windows 10”
- Software that uses a lot of resources can raise the temperature of your CPU and convert your PC’s housing unit into a cooking burner.
- There are several software options available that can assist you in changing the speed of your fan with no effort.
- You can use a third-party solution for CPU fan speed management, which will become an integral part of your daily workflow.
- Also, the BIOS contains a fan setting, so make sure you check the fan speed settings. Please continue reading to learn how to do it correctly.
The interaction of software and hardware is what allows your system to function correctly. Consider the CPU, which is a crucial component of a computer’s setup, despite its diminutive size.
The CPU, on the other hand, may malfunction if subjected to extreme temperatures for a lengthy period of time (we’re looking at you, gamers).
Now, there are several ways to avoid this (the greatest of which is probably adding extra cooling fans), and today we’ll teach you one of the most important: how to raise the speed of the CPU fan.
This is your first line of defense, and while your motherboard controls the CPU fan’s speed, it’s occasionally advisable to take care of it yourself.
If you’re unfamiliar with how to change the CPU fan’s speed in Windows 10, follow the steps below.
In Windows 10, how do I regulate the speed of my CPU fan?
1. Use a third-party fan control system
- For Windows 10, get SpeedFan.
- The CPU and GPU fans should be visible in the left panel.
- You can select the fan speed percentage there (100 percent is full throttle). You should be able to see the current temperatures of each CPU core on the right side.
- Manually control the fan speed, or set SpeedFan to increase the RPM (revolutions per minute) when the temperature rises above acceptable levels.
Built-in resources usually control the CPU fan speed. If you want to take matters into your own hands, though, SpeedFan is the best option.
You must meet some requirements to use it, and customizing it isn’t easy, but once you get the hang of it, SpeedFan will become a vital component of your daily workflow.
The conditions we listed are based on the motherboard’s ability to manage fans. This is only a concern if you decide to add additional cooling fans.
You should be able to regulate the CPU and GPU fans without any difficulty. Except for monitoring, laptops are an exception, and SpeedFan won’t be used with them.
The temperature of your CPU should never exceed 70 degrees Celsius, and 60 degrees is an acceptable limit for long periods of time.
This means you’ll be safest at around 50 degrees Fahrenheit, where the risk of critical damage from overheating is minimal.
2. Look for fan speed choices in the BIOS
- To access the Settings app, press Windows key + I.
- Security and open updates.
- Select Recovery from the left pane.
- Click Restart Now under Advanced Startup.
- Select Advanced Options from the Troubleshoot menu.
- Choose UEFI Firmware options, then click Restart.
- Your computer should start up in BIOS/UEFI mode.
- You should have no trouble accessing the fan configuration settings once you’ve arrived.
Even though SpeedFan is a nice tool, you don’t need to use the Windows interface to control the speed of a CPU fan. This can also be done through the BIOS settings. At least, that’s how it feels most of the time.
Even if different motherboard makers refer to it differently, the BIOS always has a fan setting.
You can vary the speed with some of those, while others need to be disabled to make your CPU fan run with maximum effort. To enter BIOS in Windows 10 and modify fan-related settings on your own, follow the procedures above.
As we have explained, some options allow you to modify the RPM while others are meant to make fans silent. We urge you to disable it if you have overheating concerns for the latter one.
In that manner, your CPU cooling fan will always run at maximum power and thus make your PC a bit louder but much less prone to overheating.
Conclusion
I hope you found this guide useful. If you’ve got any questions or comments, don’t hesitate to use the shape below.
User Questions:
1. How can I change the speed of my CPU fan in Windows 10?
From the submenu, choose “System Cooling Policy.” A drop-down menu will appear when you click the down arrow under “System Cooling Policy.” To boost the speed of your CPU’s cooling fan, select “Active” from the drop-down box. Then click “Apply” and “OK.”
2. How do I modify the speed of my CPU fan?
- Navigate to Fan Control in the configuration menu.
- Advanced Fan Control should be checked.
- On the right, find the Add box and click it.
- The Fan Controller should be named after the group of fans you want to control.
- Controlled Speed is the option to choose.
3. Is it possible to modify the fan speed without going into BIOS?
SpeedFan. You can use a speed fan if your computer’s BIOS does not enable you to modify the blower speed. This is one of the free applications that allows you to manage your CPU fans more precisely. SpeedFan has been around for a long time and is still the most popular fan control software.
4. How to control CPU fan speed? : r/pcmasterrace – Reddit
5. Is there a Windows 10 CPU Fan Speed Control program
Is there a Windows 10 CPU Fan Speed Control program compatible with OEM HP Motherboards? from buildapc


