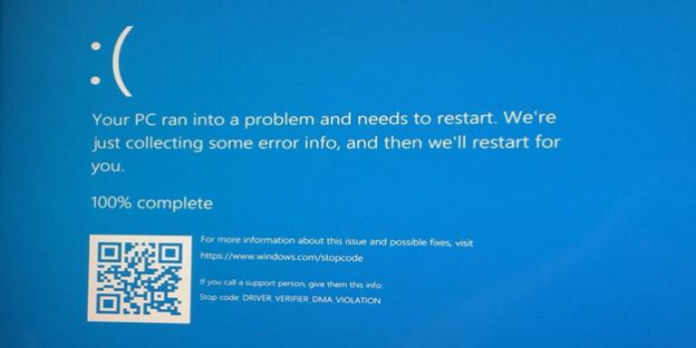
Here we can see, “How to Repair a Windows BSOD Using a Minidump File”
It happened. You’re enjoying a game, a movie, or just browsing the internet when suddenly your operating system refuses to cooperate, resulting in a BSOD or Blue Screen of Death. A BSOD signifies your system has crashed, costing you time and maybe data loss.
The worst part of a Blue Screen of Death is that anything can be caused by malfunctioning hardware, from a driver error to a page fault in a non-paged location (a result of a file not being found in memory). But don’t worry, we’ll show you how to enable and use a minidump log file to diagnose the issue.
Why You Need a Minidump File to Diagnose Your BSOD
Earlier versions of Windows provided several error codes that were somewhat helpful. In Windows 10, you get a stop code to research and a QR code to utilize with your phone. But this merely takes you to the Microsoft page, which describes various trouble numbers.
We find it helpful to configure Windows to store a file with lots of information about the BSOD and how to fix it. A minidump file.
How to Save a Minidump File in Windows.
The option to create a minidump file is disabled by default and must be enabled. Do this now, even if you don’t experience a BSOD, so you have a log when the crash occurs.
- Open the System Properties menu. Type “sysdm.cpl” into the Windows search box. Or by choosing Settings->System->About and clicking Advanced system settings.
- Click on Advanced.
- Enable the options:
- Log an event in the system log.
- Restart automatically
- Writing debugging data -> Small Memory dump (256kb).
Whenever Windows crashes, the minidump file is created under “%SystemRoot%\Minidump.” You can also move it if you like. If you do, keep in mind that most troubleshooting applications for minidump logs look for this location by default. So leave it alone. This is also C:\WindowsMinidump.
How to Read the Minidump to Find the BSOD
It’s time to obtain an application that can read the minidump file and provide relevant information. BlueScreenView is recommended for this purpose.
On the official website, you can download BlueScreenView in 32-bit or 64-bit versions.
To use the utility, you must first download it and extract it to a spot.
Double-click the “BlueScreenView” icon once the tool has been extracted. BlueScreenView will then look at the default minidump location and the current logs. If you’ve had multiple troubles or haven’t purged older minidump files, keep an eye on the logs’ dates.
BlueScreenView for Minidump Files
When you first use BlueScreenView, it will offer you a lot of data, which may be perplexing. The structure is simple and highlights the fundamental facts to get you started.
The crashed files or applications will be marked in red, letting you know where to start fixing the problem.
In this snapshot, we can observe an issue with three files: dxgmms2.sys, ntoskrnl.exe, and watchdog.sys.
In the right column of the upper panel, we can see a part that tells us what caused the accident. In this instance, the watchdog.sys caused the issue. This is a good starting point because you can now search Google or Bing for solutions.
Watchdog.sys is suspected, but what about dxgmms2.sys and ntoskrnel.exe? We need to know what the affected files are as well. They must be investigated as well. We can determine from a simple Google search that dxgmms2.sys is related to Windows DirectX drivers, whereas ntoskrnl.exe is the operating system kernel executable.
From the Windows minidump file, we can determine that the BSOD caused a graphics driver issue, which may be fixed by updating or reinstalling the driver.
In Case Of A Hardware Error In Minidump,
Unlike driver faults, a hardware failure BSOD is more challenging to repair. Error FAULTY_HARDWARE_CORRUPTED_PAGE You’d still use a program like BlueSceenWindow to track down the issue. However, when a hardware fault occurs, there is no miracle repair. In this case, the fault was caused by a memory module inserted.
We’d need to test the RAM to see if this is the real issue. This can be done with a hardware memory checker or an application. Since most individuals don’t have physical memory testers, we’ll use an application. Thankfully, Microsoft has had a memory diagnostics tool since Windows 7. Open a run prompt and type “mdsched.”
You can either Restart Now or Check for faults when I restart my computer. If you choose the first option, save your work before Windows shuts down.
It will start checking your memory after your machine restarts. Depending on the installed memory, this may take some time. You’ll see a progress meter and an overall status as the test runs. Errors will be displayed under the status section.
After the RAM test, Windows will boot. If there are no errors, your memory is fine.
Conclusion
I hope you found this information helpful. Please fill out the form below if you have any queries or comments.
User Questions:
- Do I need a minidump?
Advanced Settings icon under File menu or Options > Advanced options. 2. Next, select Browse and direct BlueScreenView to the transferred Minidump folder. Done!
2. What is Minidump in BSOD?
A Windows minidump is a short film saved to your computer whenever it crashes suddenly, like a BSoD. Depending on the Windows version, this file is located in C:\Windowsminidump or C:\Winntminidump.
3. What is a BSOD dump file?
- Select File.
- Open Crash Dump…
- Go to: C:\Windows\
- Select the MEMORY.DMP file.
- Open.
4. Need help analyzing/fixing Minidump file : r/windows
5. Had a BSOD. I have a .dmp in C:\Windows\Minidump
Had a BSOD. I have a .dmp in C:WindowsMinidump where do I go from here? from techsupport


