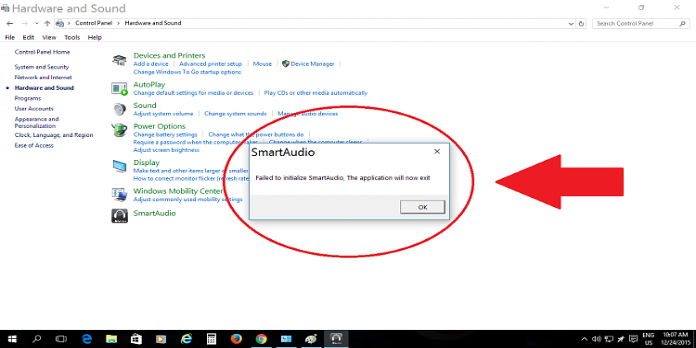
Here we can see, “How to Fix the Failed to Initialize Smartaudio Error”
- The error message Failed to initialize smartaudio frequently arises during Windows startup.
- The Conexant High Definition Audio software that comes preloaded on some Lenovo laptops and desktops is to blame for the problem.
The Failed to initialize smartaudio problem message is related to the Conexant High Definition Audio software and appears during Windows startup.
Conexant High Definition Audio is a preloaded software on select Lenovo laptops and desktops. When the problem message appears, some users lose sound.
This is how you may fix the Windows 10 issue Failed to initialize smartaudio.
How do I fix the Failed to initialize SmartAudio error?
1. Update the Conexant Driver
Several users claim that updating the Conexant SmartAudio HD driver fixed their Failed to initialize smartaudio issue on message boards.
Because Conexant does not supply drivers on its website, it is generally best to use driver update software to update the drivers.
Then press the Update All button to update all of your drivers. Alternatively, press the Update button on the right after clicking the box on the left of the Conexant audio driver.
2. Open the Playing Audio Troubleshooter
-
- Search for troubleshoot in the search box and select Troubleshoot to open the window shown directly below.
- Additional troubleshooters should be selected.
- Select Playing Audio.
- To start the troubleshooter, press the Run the troubleshooter button.
- Then go over the proposed fixes from the troubleshooter.
The Playing Audio troubleshooter in Windows 10 may fix various audio difficulties. As a result, the Failed to initialize smartaudio error message may be resolved.
3. Disable all Other Audio Device Drivers
-
- Use the Windows key + X hotkey combination.
- To access Device Manager, click on it.
- Expand the list of audio devices by double-clicking Sound, video, and gaming controllers.
- Except for Conexant SmartAudio HD, right-click all of the audio devices listed there and select Disable device options.
- Restart the Windows operating system.
4. Remove Conexant SmartAudio HD from the Windows Startup
-
- Remove Conexant SmartAudio HD from the Windows starting if it is not your preferred audio driver and manager.
- Select Task Manager by right-clicking the taskbar.
- Choose the Start-up tab, as illustrated in the screenshot below.
- On the Startup tab, find Conexant SmartAudio HD and press the Disable option.
- Restart your computer.
5. Disable Audio Enhancements for the Conexant Audio Device
-
- Select Playback devices by right-clicking the speaker system tray icon.
- Select Properties from the context menu of the Conexant audio device listed on the Playback tab.
- Choose the Enhancements tab, as shown in the screenshot below.
- Select the option to disable all enhancements (or all sound effects).
- Select the Apply option.
6. Reinstalling Conexant Audio Software
-
- To open the window directly below, press the Windows key + R hotkey, type appwiz.cpl, and click OK.
- Uninstall the Conexant SmartAudio HD program by selecting and clicking the Uninstall option.
- To confirm, press the Yes button.
- After deleting the app, restart Windows.
- Lenovo has a dedicated page where you can download the latest Conexant Audio Software for Windows 10.
- Open this Lenovo homepage to get the program if you’re using an older version of Windows.
- Finally, reinstall the software by running the Conexant Audio Software installer.
Those options are most likely to fix the Failed to initialize smartaudio problem. Aside from those fixes, you might try using System Restore to restore Windows to a previous state or restarting the audio service.
Conclusion
I hope you found this guide useful. If you’ve got any questions or comments, don’t hesitate to use the shape below.
User Questions
1. How do I make SmartAudio work again?
-
- Conexant Driver should be updated.
- Open the Audio Playing Troubleshooter.
- All other audio device drivers should be turned off.
- Conexant SmartAudio HD should be removed from the Windows Startup list.
- For the Conexant Audio Device, disable Audio Enhancements.
- The Conexant Audio Software must be reinstalled.
2. What’s wrong with my smart audio?
Please go to Settings>Update & Security>Troubleshoot and launch the Sound Playback troubleshooter. Right-click the Start Menu and select Device Manager to roll back the sound driver. Select the Sound controller device, then the Driver tab, and then the Rollback option if it’s present.
3. What is SmartAudio, exactly?
Smartaudio is a digital control signal combined with an audio signal. Both signals are combined into a single audio signal. TBS was the first to develop SmartAudio in 2015. A microphone provides the audio signal. The digital signal can be utilized remotely to control the VTX, camera, and other devices.
4. Notification Bug : r/techsupport – Reddit
5. Conexant audio drivers keep installing and making my PC
A conexant audio device could not be found. The application will now exit. from techsupport


